Showing posts with label desserts. Show all posts

Sunday, September 22, 2013

Glacé Icing

I am a firm believe that all baked goods should look and taste great (hint: they do not need to be mutually exclusive). 
Nobody really cares how pretty your cupcakes look if they have a flat (but pretty!) piece of fondant on top with no icing or, you know, flavor.  The same goes for cookies with icing that dries pretty but will break your teeth or ruins the flavor of the cookie itself.  Royal icing is notorious for looking gorgeous but tasting like.... nothing.  Hard, crusty, nothing.  I used to prefer icing my sugar cookies with buttercream to avoid this, but it's not as precise and much harder to stack if you need to transport them.  One day, I discovered glacé icing - a sweet glaze-like frosting that dries hard, can be used for detailed designs and actually tastes amazing! 
Our friends have a little guy named Kieran who had his first birthday a few weeks ago, so I took the opportunity to create some star-shaped and sports themed cookies that matched the tablecloth his mom picked out. The great thing about this icing is that one batch can make an unlimited amount of colors.  You just have to separate into smaller bowls and use gel food coloring and mix with a spoon - it's as easy as that!  If you are piping a border or plan to pipe on top of your background icing (like the football/baseball laces or the "K"'s and "1"'s) it's best to let them dry overnight in between steps so the icing doesn't run or smudge.  This recipe is pretty forgiving once you get the hang of it.  If you need more help or want some step-by-step pictures, Our Best Bites has the best tutorial ever for this technique!
Glacé Icing

1 pound bag of powdered sugar
6 tablespoons whole milk
6 tablespoons light corn syrup
1 teaspoon almond extract (or vanilla, if you prefer)

Combine the milk and sugar with a whisk attachment in the bowl of your stand mixer until no lumps remain.  Stir in corn syrup and almond extract.  Use this to glaze (for your background colors).  This is most easily done spreading the icing onto the cookie using the back of a spoon.  For piping letters or accents, I generally add another 1/2 cup to 1 cup of powdered sugar and stir until combined.  This increases the thickness of the icing and makes it easier to pipe. Remember to let the glaze dry before piping on top of it!  Use a pastry bag with a small circle tip to make this even easier.

*Remember to let them dry completely overnight before stacking!*

Sunday, August 25, 2013

Fluffernutter Sandwich Cookies

It's no secret I'm a fluffernutter fiend. <-- Make those cupcakes and you'll see why.
I lived in Spain for four months during my junior year of college.  For those who may be unfamiliar, they don't really eat peanut butter in Spain (or anywhere in Europe that I visited for that matter).  I didn't really consider this before moving or I probably would have packed about 26 jars in my luggage.  No friends, this was a lesson learned the hard way.  The funny part is, I brought my host family a gift that included Reese's Peanut Butter Cups when I arrived and my 19-year old host brother literally ate the entire bag in two days.  So I guess he didn't hate them.

After about my first month there, I discovered a little tiny store run by an expat that sold international foods, teas, and trinkets.  Lo and behold.... peanut butter.  I think it was like 8 or 9 euros a jar but obviously it was a no-brainer.  I would have asked the shop owner to procure me some marshmallow fluff, but I didn't want to push my luck.
Fluffernutter Sandwich Cookies
Makes about 10 sandwiches (20 cookies)
Cookie recipe from Bakers Royale; frosting adapted from How Sweet Eats

1 cup peanut butter (smooth or crunchy)
1 cup sugar
1 large egg, lightly beaten
1 teaspoon vanilla extract

4 tablespoons butter
1/2 cup marshmallow fluff
1 teaspoon vanilla
1 cup powdered sugar

For the cookies: place all ingredients in the bowl of a stand mixer and mix on low until combined.  Using a cookie dough scoop or a rounded tablespoon, place about a tablespoon and a half of dough onto parchment-lined baking sheet.  Use a fork to flatten the dough using a criss-cross design.  Bake for about 10-12 minutes or until they begin to turn golden brown around the edges.  Let the cookies rest on the sheets for a few minutes before transferring to cooling racks to cool completely.

For the frosting: beat the butter in the bowl of a stand mixer until creamy.  Add the fluff and beat again until combined.  Scrape the bowl to make sure everything is incorporated.  Stir in the vanilla. Finally, stir in the powdered sugar a little bit at a time and then beat until creamy.

To assemble: spread the marshmallow buttercream between two (completely cooled!) cookies to make a sandwich.  Enjoy!


Tuesday, July 23, 2013

Chocolate Peanut Butter No-Bake Cookies

I was under a cookie curse for about a month before my wedding.
No matter what recipe I tried to make in those few weeks, they were epic fails.  I burned one batch.  Another batch spread way too much to form one big jumbled mega-cookie.  My Silpat slipped and I dropped a different batch on my open oven door before I could bake them.  The oven door was hot so they immediately started cooking and it took like 20 minutes to scrape off and clean up.  Point being - there was some serious bad cookie juju going on.  The thing is... up until that point, I had NEVER screwed up cookies.  Some of these were tried and true recipes I've made a million times before.  I chalk it up to wedding brain and trying to focus on a million other things, but to this day I have not figured it out. 

The greatest part of these particular cookies?  No baking!  They're fast, there is no oven involved (perfect for summer if you don't want to heat up your house) and they're gluten free.  These come together in about 20 minutes total and are totally foolproof.  Take that, bad cookie juju.

Chocolate Peanut Butter No-Bake Cookies:
Heavily adapted from Brown Eyed Baker
Makes about 30 cookies


1 stick butter
2 cups sugar
1/2 cup milk
4 tablespoons Hershey's Special Dark Cocoa powder
1/2 cup creamy peanut butter
2 teaspoons vanilla extract
3 cups quick cooking oats
peanut butter chips

In a medium saucepan, combine butter, sugar, milk and cocoa powder over medium heat.  Bring to a boil while whisking smooth, and let boil for about a minute.  Remove from heat.  Stir in peanut butter and vanilla extract, and stir until the peanut butter melts.  Add the oats and stir to coat.  Drop by rounded tablespoons onto wax covered baking sheets.  Individually press peanut butter chips into the tops of the cookies, if desired.  Let cookies cool on baking sheets until they are set.

Wednesday, July 10, 2013

S'mores Cupcakes

Well, helloooooooo summer love.
To me, summer means a few things.  I am unfortunately not a kid anymore so summers off is not one of them.  But summer does mean the days are longer, the colors seem brighter, and I seem to be able to eat my body weight in fresh watermelon and cantaloupe.  Summer also screams for the classic combination of chocolate, graham cracker and marshmallow.  I've been looking for the perfect s'mores cupcake recipe for awhile now, but I couldn't find anything that fit my vision.  Most of the recipes I found had a chocolate cake base with a marshmallow frosting, and the graham sort of took a backseat with either a little square on top or some crumbs as the base.  Finally, I decided to take bits and pieces of other recipes to create my perfect Frankenstein s'mores cupcake.  These babies have a dense graham cracker cake, a milk chocolate filling, and a rich and fluffy marshmallow buttercream.  I rolled the outside in extra graham cracker crumbs and garnished with some chocolate pieces, mini marshmallows, a chocolate covered-graham cracker and a drizzle of ganache.  Ohmygoodness.  It's pretty safe to say these didn't make it two full days in our house.  They did, however, make it into my top 3 cupcake recipes of all time.  Allow me to introduce you to your new summer love (a la Justin Timberlake circa 2006).

S'mores Cupcakes:
Makes 12 cupcakes

Graham Cracker Cupcake (source: Vanilla Garlic)
1 stick butter, room temperature
1 cup sugar
3 eggs, room temperature

Friday, June 7, 2013

Lemon Cupcakes with Lemon Buttercream

Happy Friday! I, for one, am super excited for this day.  We leave for the beach and I am wayyy overdue for some sand & sun.  This is richly evidenced by my dramatic "oh, woe is me... I'm so overworked" attitude lately and my Casper-the-Ghost-like appearance.  But that all changes today!
Hubs and I on Sunset Beach in Cape May (Tina Markoe Photography)
We go to Cape May every year and let me tell you it is one of the best food towns around.  They have everything from casual sit-down restaurants to white tablecloth fine dining.  It also happens to be the tail end of restaurant week, with some fixed price menus that let me taste a few courses more than I normally might. Yum!  What more could a girl want?  I will have to update you guys on some of my fabulous meals when I get home.
Before I go, I wanted to share this amazing recipe with you from Shugary Sweets.  Lemon is a flavor I just don't get tired of.  My husband will eat chocolate til he's sick, and I sort of feel that way about lemons.  While normal, well-adjusted people order lemon slices for their water at a restaurant, I usually grab them and just suck on them while I wait for my food.  Normally, I'll top my lemon cupcakes with a lemon cream cheese frosting, but Aimee adds this amaaaahzing lemon buttercream to her cakes that is so good it should pretty much be illegal.  You can find her original recipe here.  Make these ASAP for the favorite lemon-lover in your life!
Lemon Cupcakes with Lemon Buttercream:
Recipe by Shugary Sweets
Makes 24 cupcakes

5 egg whites, room temperature
3/4 cup buttermilk
2 lemons, zested
3/4 cup unsalted butter, softened
1 3/4 cups sugar
2 1/2 cups cake flour
1 tablespoon baking powder
1/2 tsp salt

1 cup unsalted butter, softened
4 cups powdered sugar
1 lemon, zested and juiced
2 T heavy cream

Preheat your oven to 350 degrees and prepare two muffin tins with paper cupcake liners.  Mix together the egg whites, 1/4 cup of the buttermilk and the lemon zest in a small bowl or liquid measuring cup.  Set aside.  In the bowl of a stand mixer, beat butter and sugar until light and fluffy, about 2-3 minutes.  Slowly mix in dry ingredients until well combined.  Slowly add in egg white mixture and mix again.  Add remaining buttermilk and combine one final time.  Fill cupcake liners half full and bake for 15 minutes. Remove from the oven and allow the cupcakes to cool in the pans for 5 minutes before transferring to wire racks to cool completely.

For the frosting, beat butter for 2-3 minutes until light and fluffy.  Add lemon juice and zest, heavy cream, and powdered sugar (slowly, so the sugar doesn't fly everywhere!) until fully combined.  Beat on high for 3-5 minutes until fluffy.  Pipe frosting onto cupcakes when they are completely cooled.

Monday, May 27, 2013

American Buttercream Frosting (...and a Wedding!)

Happy Memorial Day, everyone!  I'm currently writing this preemptively dreading returning to work tomorrow.  The days after long weekends are just.the.worst.  At the same time, I am super content and reflective about how great a weekend it was... not to mention the freedoms we have and who made it all possible.  Thank you vets - past, present and future!
It was a very exciting weekend for me, for sure... I had my first wedding order.  A friend (hiiii, Amy) asked me a while ago if I would consider making cupcakes and a small cake for her friends wedding.  After a small panic attack from the pressure of baking for such an important occasion, I happily accepted and began the planning process.  The wedding was this Sunday and after three and a half heart attacks while transporting them to the location (I was 100% sure someone was going to rear-end me on the way there and ruin everything) I am super happy with the way everything turned out.  Big shout out to my mom and amazing husband for their support and encouragement and to Amy and Sara for giving me a shot!  You guys are pretty awesome.
I figured this would be a wonderful opportunity to share with you one of my favorite American buttercream recipes.  Considering the name of this blog, it's only fitting.  And probably should have been my first recipe?  Hmm.  Anyway, it's important to note that I use different recipes depending on the intent - whipped frostings, Italian buttercreams, Swiss Meringue Buttercreams, and French buttercreams certainly have their places and I even prefer them at times.  I could write an entire post on the different uses, benefits and flavors of each type, but I will save that for another day. 

This recipe is a great all-purpose, medium consistency, crusting buttercream that holds it's shape to pipe on cupcakes, cookies and cakes. It's the recipe my mom always used on cakes growing up and each time I make it I'm transported my six year-old self in her kitchen licking the beater.  I don't love using shortening, but I use a small amount and it does help the frosting hold it's shape a bit better than all-butter recipes.  This usually makes just enough to frost 24 cupcakes or an 8-inch layer cake, but I love frosting and having extra to add decorations and details so I generally double the recipe and freeze whatever's leftover (if anything).  Have I mentioned I like frosting?
American Buttercream Frosting:
1 stick butter, softened to room temperature (soft, but not melted)
1/4 cup vegetable shortening
1 pound bag of powdered sugar
1 teaspoon vanilla extract
3-4 tablespoons milk or heavy cream
dash of salt

Blend the butter and shortening together in the bowl of your mixer until light and fluffy (about 3 minutes).  Scrape the sides of the bowl to make sure everything is blended.  Add the vanilla, milk, salt, and about half of the powdered sugar.  Mix on low speed until blended.  Add the remaining powdered sugar and beat on medium high speed until fluffy.  If your frosting is too runny, add some more powdered sugar.  If it's too stiff, add a touch more milk or cream.

A few tips: 
  • Room temperature butter is super important.  Do not try to mix cold butter! If you are in a pinch, slice your butter into small pieces (about tablespoon size) and leave on the counter.  This increases the surface area and the butter comes to room temperature much faster.
  • Use a clear vanilla extract and a bit more shortening to butter ratio if you want a brighter, more pure white.  The butter does make it slightly off-white.  This recipe also is very easy to color with a bit of gel food coloring.
  • This frosting is super forgiving! Add more liquid if too stiff or more sugar if too runny.  It's foolproof.
  • Experiment with flavors.  This is a great base recipe and super versatile.  Add some lemon, orange or coconut extract for different flavor combinations.  Add some cocoa and make a chocolate buttercream.  Be creative!

Sunday, May 5, 2013

Rose Cake - Kentucky Derby Weekend!

It was certainly an eventful weekend for festive folks like us.  The Kentucky Derby and Cinco de Mayo in one weekend?  And they are both holidays that revolve largely around food and drink.  Yes and yes, please!
We get very into Derby Day for two Pennsylvania yanks.  We like the tradition, the pageantry, and the competition of who can pick the winning horses throughout the day.  Hubs and I hosted a party to mark the occasion and I knew right away I wanted to make a red Rose cake as the most literal interpretation of the "Run for the Roses".  This style of cake decorating has been everywhere around the web as of late, and I made it once before successfully for Mother's Day so I was pretty comfortable with the technique.  There is something very impressive and classic about the presentation, and it is surprisingly easy to do.
You can use a Wilton 1M or 2D tip.  Start in the middle of where you want your first rose, and pipe in an outward circle.  All you have to do is repeat until your cake is covered!  If you want a more in-depth tutorial on how to make your own rose cake, i am baker has a great one you can find here.
 
We also enjoyed some traditional Benedictine sandwiches and these Pecan Pie Truffles with a healthy dose of bourbon as our spin on Derby Pies.  Everything was delicious and Greg picked the winning horse... all in all a great day! 


Wednesday, April 24, 2013

Puppy Chow Popcorn

One of my fondest memories of being on the summer swim team while I was growing up was... the snack bar.  Ha!  I really wish I was joking.  Swim star, I was not.
Every once in awhile they'd have homemade items that a few of the moms would sell along with the other goodies.  I'd always jump at the chance for the ubiquitous little plastic baggies of peanut butter & chocolate covered Chex® cereal that was coated in a nice thick layer of powdered sugar.  I grew up calling it "puppy chow" although it is also pretty well known as "muddy buddies".  Neither name sounds particularly appetizing if you ask me.  By the way, if you're going to google "puppy chow" for the original recipe, do not click on the first link that comes up.  Because that is actual dog food and that would be a mistake.

In a recent conversation with my husband, he let slip that he'd never actually had puppy chow.  Um, excuse me?  How is that possible?  I thought that was pretty much a childhood requirement, not to mention he is literally the king of anything chocolate + peanut butter.  If there were literally kings of such things.  He swears we've had this conversation before, but I think I would remember something as sad as someone never having puppy chow! 
Since I don't always have Chex® on hand, but we pretty much always have popcorn, I decided to look for some sort of Puppy Chow Popcorn creation.  Apparently, I'm late to the party because everyone and their mother has already had this ingenious idea.  This version I found on Tasty Kitchen is the same as the standard puppy chow recipe, but you swap popcorn for the rice cereal.  Try this chocolaty-peanut buttery-salty-sweet creation when a snack attack hits or when you're simply feeling nostalgic for a childhood treat. 

Puppy Chow Popcorn:
Recipe from Tasty Kitchen, adapted from Chex®

9 cups popped microwave popcorn
1 cup semisweet chocolate chips
1/2 cup peanut butter
1/4 cup butter
1 teaspoon vanilla
1 1/2 cups powdered sugar

Prepare your popcorn according to package directions and set aside in a very large bowl.  Be sure to remove any unpopped kernels at this point to avoid covering them chocolate and eating them whole later!  Melt chocolate chips, peanut butter and butter together in the microwave until completely melted.  Stir in vanilla.  Pour melted chocolate mixture over popped popcorn.  Stir until everything is evenly coated.  Add the powdered sugar and stir again until everything is evenly coated.  Spread the popcorn mixture onto cookie sheets, and allow the chocolate to set.  Serve and transfer any leftovers to an airtight container.

Just a heads up: this has gotten my wheels turning for other puppy chow inspired ideas: Cake? Truffles? Cupcakes? Stay tuned!

Saturday, April 13, 2013

Lemon Ricotta Cookies with Lemon Glaze

Happy Weekend time, friends!  This week was a doozy.  I was traveling for work and stayed in a hotel with no internet (side note: what hotel doesn't have internet anymore? It's 2013.)  Because of this, there was an appalling lack of posting this week. For that, I am truly sorry.  I will make it up to you by sharing these amazing Lemon Ricotta Cookies with Lemon Glaze from my main Food Network babe Giada DeLaurentiis.
I first made these cookies as part of a Christmas cookie ensemble a few years ago to break up all the chocolate options I had, and they have been in the regular rotation ever since.  I think they work even better in April where the bright, lemony flavor is reminiscent of all things Spring.  The ricotta gives these cookies a dense but fluffy texture, making these babies airy little lemon clouds of yum.  That's the highly-technical foodie description.  Clouds of yum.  The cookies themselves are not overly sweet, but the glaze adds the perfect amount of sweetness and tartness in that second layer of lemon flavor that is totally drool-inducing.  If you are a lemon lover, these are a must make.

Second side note: while making these, a sheet of parchment with raw cookies slid directly on to my hot oven door, I accidentally hit the mixer to "on" before I was ready and spewed dry ingredients all over myself, and I dropped a whisk coated with glaze all over my floor.  But it's Saturday, it's sunny, and I have freshly baked cookies, so I'm choosing to be okay with it. 
Lemon Ricotta Cookies with Lemon Glaze:
Recipe by Giada DeLaurentiis from the Food Network
Makes about 44 cookies

2 1/2 cups flour
1 teaspoon baking powder
1 teaspoon salt
1 stick unsalted butter, softened
2 cups sugar
2 eggs
1 (15-oz) container whole milk ricotta cheese
3 tablespoons fresh lemon juice
1 lemon, zested

Glaze:
1 1/2 cups powdered sugar
3 tablespoons fresh lemon juice
1 lemon, zested

Preheat the oven to 375 degrees.  Line two cookie sheets with parchment paper.  In a medium bowl, combine the flour, baking powder and salt.  Set aside.  In the bowl of an electric mixer, add the softened butter and sugar.  Beat until lighter in color and fluffy, about 3 minutes.  Add the eggs one at a time, mixing to combine after each addition.  Scrape the sides as needed, then add the ricotta, lemon juice and lemon zest.  Beat until thoroughly combined.  Add the dry ingredients gradually and beat once more until incorporated.

Drop the dough (each cookie should be about 2 tablespoons) onto the prepared cookie sheets.  Bake for 13-15 minutes or until the edges begin to turn slightly golden brown.   Leave the cookies on the baking sheet for about 20 minutes, then transfer to a cooling rack to cool completely.  Stir all ingredients for the glaze together with a whisk.  Spoon onto each cookie and spread around gently.  Let the glaze harden for about 2 hours before storing and/or stacking. 

Thursday, April 4, 2013

Triple Chocolate Cupcakes (with Nutella) for 2!

I made 72 cupcakes last weekend. Yikes.
They were obviously not all for me.  Even I have limits!  But after delivering half to a coworker for his holiday gathering and taking the rest to our Easter dinner, I still had about a dozen left over.  When there are only two people in your house, that's just bad news.  I am only human, after all... and who would go for the oatmeal in the morning when those bad boys are staring at you from the cake stand?  No one.
That's why Christina over at Dessert for Two is such a godsend.  She makes delicious dessert recipes scaled down for a household of two!  On normal, non-holiday occasions when I want just a small taste of dessert for my husband and me, she has all kinds of recipes that fit the bill.  No more having to give the rest away at work or to family just to save me from myself and a late night cookie/cupcake/insert-other-dessert-here binge.  Make sure you head over to her site to

Sunday, March 31, 2013

Red Velvet Cake Balls

One thing that stinks about being an adult: lack of birthday parties. 
You may still get together with friends, have some wine, go out to eat, etc.  But I'm talking about old school birthday parties with elaborate themes, every single one of your friends, cake, ice cream, candy, soda and party favors.  Before you cared about counting calories or where on your thighs those snacks would end up.  Where you'd run around with your friends for a few hours and be sent home buzzing around like a maniac from the crazy extreme sugar high.  I was at a few with ponies.  Oh yes.  Those were the days.
I had the same college roommate all four years of school (hiiiiii, Di!).  We had known each other from high school, and decided to room together when we found out we were attending the same college.  She lovessss her some red velvet cake, so her mom made her one every year for her birthday.  Ever since we graduated, in an attempt to relive the glory days and/or sugar highs of childhood, I make her red velvet cupcakes.  I wanted to switch it up this year and try red velvet in a different form.  These cake balls have all the flavors of red velvet cake, with the cake and frosting rolled together and then dipped in dark chocolate.  I gave these babies a nice neon chocolate drizzle in homage to our 90's upbringing and finished them with some confetti-colored birthday sprinkles.
I'm bringing the candy-induced sugar coma back for birthdays, baby.

Red Velvet Cake Balls:
Makes around 60 cake balls

1 box of Red Velvet cake mix + ingredients required on the box to make it
1 (8oz) pkg cream cheese, softened
1 stick of butter, softened
1/2 teaspoon vanilla
2 cups of powdered sugar
chocolate candy melting wafers (milk, dark or white - I used dark)
colored chocolate melting wafers for drizzle, optional
sprinkles for decoration, optional

Bake the red velvet cake in a 9x13 pan according to package directions.  Set aside to cool completely.

While cake is cooling, make the frosting.  In a mixer fitted with a paddle attachment, beat the cream cheese, butter and vanilla together until smooth.  Add the sugar on low speed and beat until incorporated.  Increase the speed to high and mix until very light and fluffy.

Once the cake has cooled, crumble with your hands into a large bowl.  Take 1 3/4 cups of the cream cheese frosting and spoon in the bowl with the cake crumbles.  Freeze any remaining frosting for later use (resist the urge to promptly devour over the kitchen sink with a spoon).  Mix the frosting and the cake crumbles using your hands until thoroughly mixed and uniform.  If too dry, add a few more spoonfuls of frosting, but be sure it's not too wet or it will be difficult to roll.  Using your hands, roll into one-inch balls and place on a cookie sheet lined with wax paper.  Refrigerate for about 30 minutes to make them easier to dip. 

When ready, melt the chocolate candy melting wafers in 30 second increments in the microwave.  Stir until smooth.  Dip each cake ball in the chocolate and place back on the wax paper-lined cookie sheet.  Drizzle with colored chocolate and sprinkles, if desired.  Store in the refrigerator.
They're like a party in your mouth.

Sunday, March 24, 2013

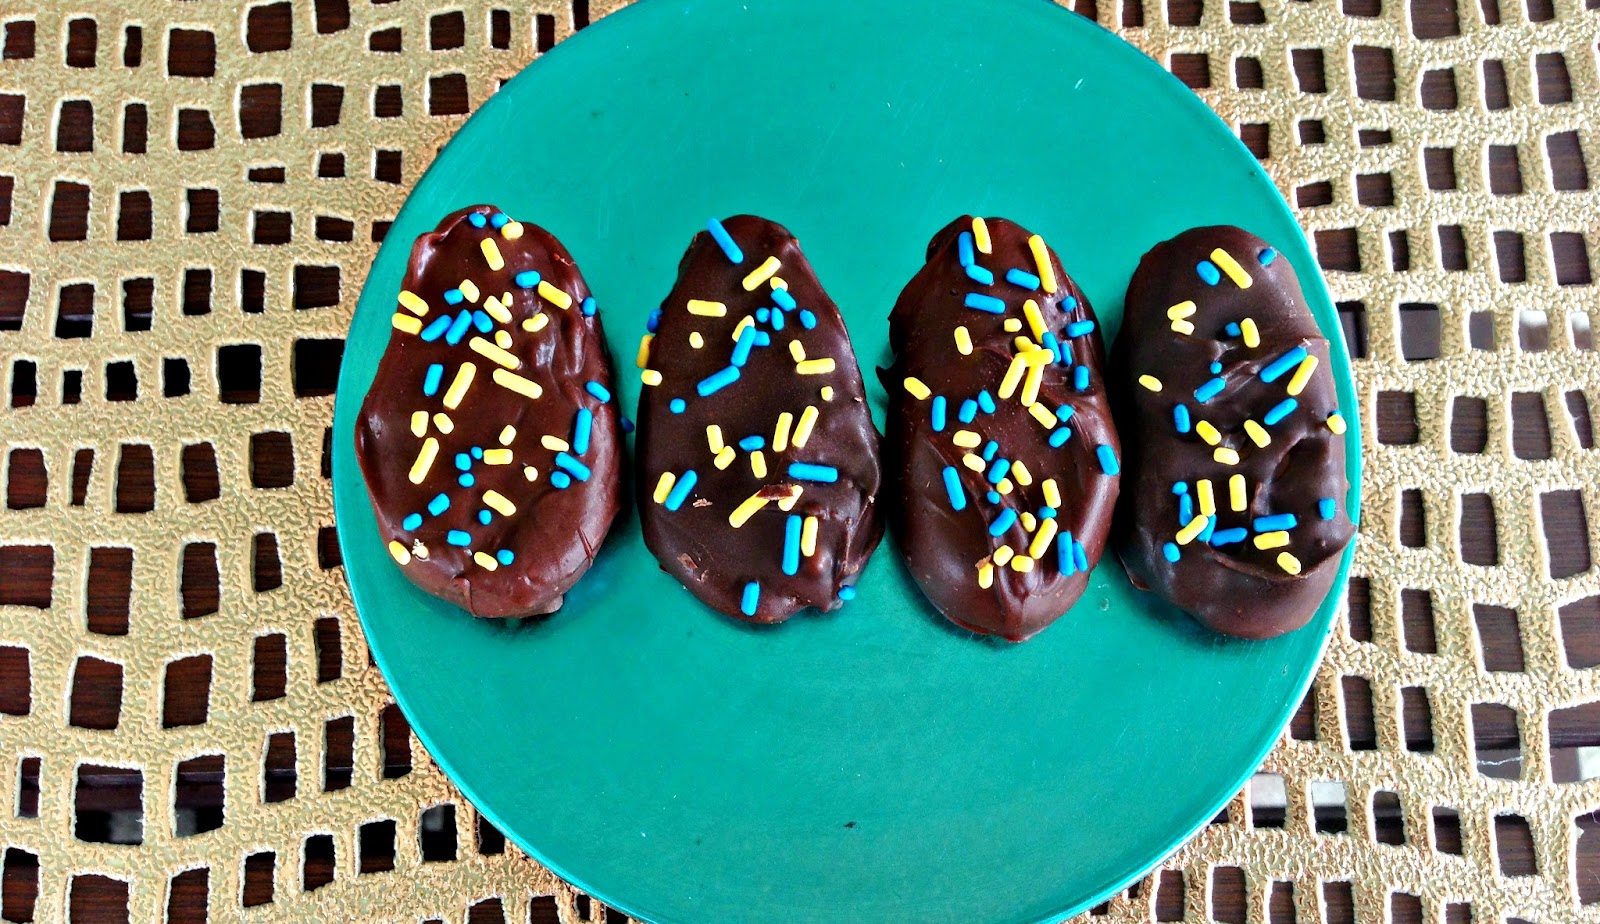
Chocolate Covered Easter Eggs (Peanut Butter and Coconut Crème)

I must be feeling awfully generous today.  I have not one, but two wonderfully festive Easter candy recipes for you!
I have enjoyed these recipes my entire life and they are two of the many reasons I look forward to Spring every year.  I love Starburst jelly beans and Cadbury eggs as much as the next girl, but homemade peanut butter eggs and coconut crème-filled eggs pretty much rock my world.  I would eat these all year long if it wasn't for fear of my waistline exponentially expanding.  My mother got the recipe almost 40 years ago from a Pennsylvania Dutch woman named Bonnie Dry, who had the recipe in her family as long as she could remember.  You can tell it's a really old school recipe by the presence of egg whites.  If this skeeves you out, you can totally omit them, but I like what they do for the consistency.  You can read more about egg safety here.  We've been eating them this way forever and while I may be a little strange, I am otherwise unscathed. 
And let's get real for a second.  You people that don't like coconut... we can't really be friends anymore.  Okay we can still be friends, but I will outwardly judge you and try to change your mind every. single. year.  Because you're crazy.  Don't worry, my husband is among you, but you're crazy.

Homemade Peanut Butter Eggs:
Makes around 75 eggs (depending on the size you roll them)

2 sticks of butter, softened
2 teaspoons vanilla
2 egg whites
1 small jar peanut butter
1 1/2 lbs powdered sugar
chocolate for dipping (I usually use dark)

In the bowl of a mixer fitted with the paddle attachment, mix the butter, vanilla, the egg whites and the peanut butter until smooth.  Gradually add the powdered sugar.  Mix until uniformly combined.  Roll into egg-shaped blobs and refrigerate or freeze for 20 minutes or so to make them easier to dip.  Melt the chocolate, dip the peanut butter eggs into the chocolate, and shake off excess chocolate.  Decorate, if desired, but I mostly prefer mine naked.  Refrigerate until hardened.

Homemade Coconut Crème Eggs:
Makes about 75 eggs (depending on the size you roll them)

8 oz cream cheese, softened
1 stick butter, softened
2 cups coconut
2 teaspoons vanilla
2 lbs powdered sugar
chocolate for dipping (I use dark)

In the bowl of a mixer fitted with the paddle attachment, mix together cream cheese, butter, coconut, and vanilla until combined.  Gradually add the powdered sugar.  Mix until uniformly combined.  Roll into egg-shaped blobs and refrigerate for 20 minutes or so to make them easier to dip.  Melt the chocolate, dip the coconut eggs into the chocolate, and shake off excess chocolate.  Decorate, if desired.  Refrigerate until hardened.

Sunday, March 17, 2013

Double Mint Dark Chocolate Cupcakes (St. Patty's Day Special!)

Contrary to what it may seem like, I do not eat cupcakes every day.
My husband had a special request for something in the chocolate mint category, and I figured St. Patrick's Day was a perfect occasion to try out this flavor combo for him.  When brainstorming, I knew I wanted a dark chocolate cake with a some sort of creamy mint filling, and a refreshing (and festive!) green mint buttercream on top.  I am not even 1% Irish, but who doesn't love a good holiday? Besides. . .  I like to think I look good in green, and these cupcakes do, too.
I adapted the dark chocolate cake and mint filling recipe from Dinners, Dishes & Desserts, and topped it with my favorite buttercream recipe spiked with a bit of peppermint extract.  And what cupcake

Friday, March 15, 2013

Chocolate Chip Cookie Dough Cupcakes

Try to be unhappy when you're eating a cupcake.  Just. . . try.  It's pretty much impossible.  Just looking at this picture makes me giddy.
So last weekend, I finally decided to tackle these Chocolate Chip Cookie Dough Cupcakes.  They have been on my list for awhile, but I needed to scour the Internet to find the perfect recipe that had the right balance of chocolate chip flavor in the cake, an eggless cookie dough filling and a fluffy brown sugar buttercream.  And spell check really needs to stop telling me "buttercream" isn't a word because it's going to be a reoccurring theme on this blog.  Obviously.
I hit the jackpot with this recipe from Amanda at Fake Ginger.  It has a dense, chocolate chip flecked cake with a filling that tastes exactly like the cookie dough you sneak while baking that you know you

Wednesday, March 13, 2013

Homemade Marshmallow Fondant

You know how I remember a wedding?  Cake.  The answer is always cake.  I won't comment on the flowers, decorations, or color scheme selected by the bride and groom because I know how much work goes in to a wedding and how much time is spent making these decisions.  Even if it's not my style, I love that it expresses their personalities and can appreciate the uniqueness of every individual wedding.  But there better be some good cake or I will judge you on a deep and personal level. 
This was our wedding cake.  And it was goooo-ood.
I've been to some weddings where I swear they served me a roughly 1/4 inch slice.  Um, no.  Or where they intricately decorated a cake with Styrofoam and had sheet cakes in the back. What? It's still just as hard to make sugar flowers for a block of foam... I don't get it.  I've also been to some weddings where the gummy fondant was rolled at least a half an inch thick and once it was peeled back, there was hardly even any cake underneath it. Icky.

However, it's hard to beat the clean, unblemished look that fondant gives a cake. When I started to make more cakes at home and trying to increase my decorating repertoire, I knew homemade
fondant was something I wanted to try.  I scoured the web and there are tons of recipes - some had crazy ingredients like glycerin and xanthan gum.  Finally, I came across a few that used good old-fashioned marshmallows and decided to go for it.  My sister-in-law had her second baby shower coming up for her husband's side of the family, and I was asked to make the cake.  It was a jungle theme, so I used the plain white fondant to cover the cake and then colored the remainder to make a few jungle related cut-outs.  I used the extra to mold a little monkey on top, and I think it worked pretty well.
The best part is, it tasted great!  I put a thin layer of peanut butter buttercream on the cake for the fondant to adhere to, and that was the main flavor that came through.  It's a little delicate and I

Thursday, March 7, 2013

Fluffernutter Cupcakes

These cupcakes. I live and die by these cupcakes.


I know you're thinking "not such a wonderful picture you have there" but the truth is these really didn't hang around long enough to be photographed in any sort of presentable manner.

Okay, that's a bit dramatic.  But these really are the most amazing cupcakes on the planet.  Sorry, I can't stop.

My husband's dessert philosophy baffles me.  Chocolate and peanut butter all the way, all the time.  Don't get me wrong, it's an amazing combination, and one that I enjoy myself quite often.  But I'm different in the way that I order desserts depending on what mood I'm in at that very second.  Lemon & white chocolate one day could be followed by some sort of chocolate indulgence overload the next, and then next time I'll want something with salted caramel oozing out of it.  This is why it takes me 10 minutes at our favorite ice cream shop at the beach to order - I have to figure out what I'm in the mood for while he looks at the menu, spots "chocolate & peanut bu...." and closes it back up.  There are so many crazy delicious combinations in the world that I can't imagine just limiting myself to one. 
I digress.

These cupcakes were originally found on my favorite food blog of all time,
How Sweet It Is.  Jessica is my
Related Posts Plugin for WordPress, Blogger...