Before you say it, I am not wishing these last few weeks of summer away. I'm eating tons of fresh summer produce while it's still available, wearing the heck out of my white pants and soaking up all the sun I can.
I'm not ready to start up on the fall recipes quite yet... I just love putting pumpkin in stuff. Soups, desserts, main dishes, everything. And I've never been one of those people that eats pumpkin dishes only in the fall. Especially dishes that taste restaurant quality like this one. I mean, something magical happens when you swirl sage in brown butter until it's crispy. It's transcendent.
Most of the ingredients are pantry items so I find myself making this quite a bit throughout the year. It can be a quick weeknight meal for the hubs and me, but it's also fancy enough to impress company. Do yourself a favor and go get some pumpkin just a bit early if you haven't yet. Fall will be here soon whether we like it or not!
Pumpkin Gnocchi with Brown Butter and Sage
Serves 2
Recipe from Foodess.com
1 cup pumpkin puree
1 egg
3/4 teaspoon salt
1/4 teaspoon nutmeg
1 1/2 cups flour (or a little more)
3 tablespoons butter
1/4 cup sage leaves, roughly chopped
sea salt
Parmesan cheese, grated, for serving
Boil a large pot of water. In a medium bowl, mix pumpkin, egg, salt and nutmeg to combine. Stir the flour into the pumpkin mixture in several additions. If the dough is still sticky, add a bit more flour. On a floured work surface and with floured hands, separate the dough into quarters. Roll one of the quarters into a long rope about one inch thick on the work surface. Using a pastry cutter or bench scraper, cut the rope into small pieces. Repeat with the remaining dough.
Drop the gnocchi into the boiling pot and cook until they rise to the surface, about 4-5 minutes. While the gnocchi cooks, melt the butter in a large pan. Add the sage leaves and swirl frequently until the butter turns golden in color. Remove from heat. Use a slotted spoon to transfer the cooked gnocchi onto paper towels to drain, then add to the brown butter and sage mixture and toss. Transfer to serving dishes and sprinkle with sea salt and Parmesan cheese. Serve immediately.
Showing posts with label cheese. Show all posts
Wednesday, August 21, 2013
Tuesday, July 30, 2013
Parmesan Grilled Corn
I hate to admit it, but I'm still kind afraid of my grill. There are too many knobs. And I always envision there being some sort of gas leak explosion when I turn it on. Oh, oh... and when I opened it this most recent time? SPIDER IN THE GRILL. Inside of it, directly where I wanted to put my food. It was a traumatic experience. Dramatic? Perhaps.
But still disgusting.
This corn, however, is amazing. I may be weary of the grill but I never miss a chance to give a vegetable a good trashin' up. Sweet corn is aplenty right now where I live (not to mention dirt cheap) and I've been partial to grilling it in aluminum foil to keep it nice and juicy. It's delicious plain with some salt and pepper, but what isn't better covered in melted butter and cheese? Throw some garlic and fresh parsley in the mix and you have a super easy/delicious side for your next cookout.
Parmesan Grilled Corn:
Makes 6 servings
6 ears of fresh corn
4 tablespoons of butter
2 cloves of garlic, grated or minced
1/2 cup Parmesan cheese
2 tablespoons fresh parsley, chopped
Preheat your grill to medium-high heat. If corn is still in the husk, remove and discard the husk and silks. Wrap each ear of corn in aluminum foil (don't make the foil too thick - one layer between the corn and the grill is enough). Grill the corn for about 20 minutes, turning every 5 minutes or so to ensure even grilling. While corn is grilling, melt butter and garlic together in a small bowl in the microwave. When corn is finished, brush the garlic butter over each ear of corn. Immediately sprinkle with Parmesan cheese and then garnish with the fresh parsley. Devour.
Wednesday, May 22, 2013
Balsamic Chicken with Caprese Asparagus
Summer has finally come to PA. We sort of fast forwarded through the Spring part, but hey... at least it's not snowing.
Summertime means lighter meals, colder drinks, and lots of time spent in front of the grill. This is the quintessential summer weeknight meal. It's light, healthy, delicious and packed with nutrients. While pretty enough for company, it takes about 30 minutes start to finish for those lazy summer nights when it's too muggy to move. It may not be a true caprese (where's the basil?!) but I took a little creative liberty with the recipe title. So, what are you waiting for? Get grillin'!
Balsamic Chicken with Caprese Asparagus:
Serves 2-4
2 boneless skinless chicken breasts
1 bunch asparagus
1/2 pint grape tomatoes
4 oz reduced-fat mozzarella cheese
1/2 cup plus 2 tablespoons balsamic vinegar
1/4 cup plus 1 teaspoon olive oil
1/2 teaspoon garlic powder
1/4 teaspoon pepper
1/2 teaspoon garlic salt
Slice chicken breasts in half to create four thin chicken cutlets. In a large Ziploc bag, combine 1/2 cup balsamic vinegar with 1/4 cup olive oil, garlic powder and pepper. Add chicken to the bag and marinate for 30 minutes up to overnight.
Preheat oven to 400 degrees. Line a cookie sheet with aluminum foil. Place asparagus on the sheet and drizzle with olive oil (I used my Misto) and garlic salt. Bake for 8-10 minutes until the asparagus is tender.
When asparagus is placed in the oven, start to grill your chicken until done (165 degrees internal temperature). While the chicken and asparagus are cooking, place sliced grape tomatoes and remaining 2 tablespoons balsamic vinegar and 1 teaspoon olive oil in a frying pan. Cook on medium-low heat until soft, stirring occasionally.
When everything is done cooking, place chicken and asparagus on plates and top with tomatoes and mozzarella.
Monday, April 22, 2013
Jalapeño Popper Chicken Chili
Hello, Monday. We meet again. You would think I'd be used to you, but after lovely weekends like this past one, you're even tougher to handle than usual. Maybe like a I-need-four-cups-of-coffee-morning kind of tough.
Greg and I decided to finally take a day trip to Baltimore to walk the inner harbor shops and visit the aquarium, which I haven't gotten to do in years. It's amazing how some prolonged whining and hint-dropping can wear down a husband! We topped off our fabulous date-day with an amazing dinner with friends who live in the area (helloooo crab cake heaven! Umm, best ever). What is it about a good meal at the end of an even better day that puts you in a state of pure bliss?
You would think I would have a Maryland theme-y recipe for you today like crab cakes, fried oysters or some other seafood, but.... no. Unfortunately, I am not that organized and that idea didn't hit me until right now. But I do have a fabulous Jalapeño Popper Chicken Chili for you! It's yummy enough that you will forgive me, promise.
I found this recipe via Stacy (another fabulous Pinterest find!) and was instantly intrigued. Did you ever read through a recipe and just 
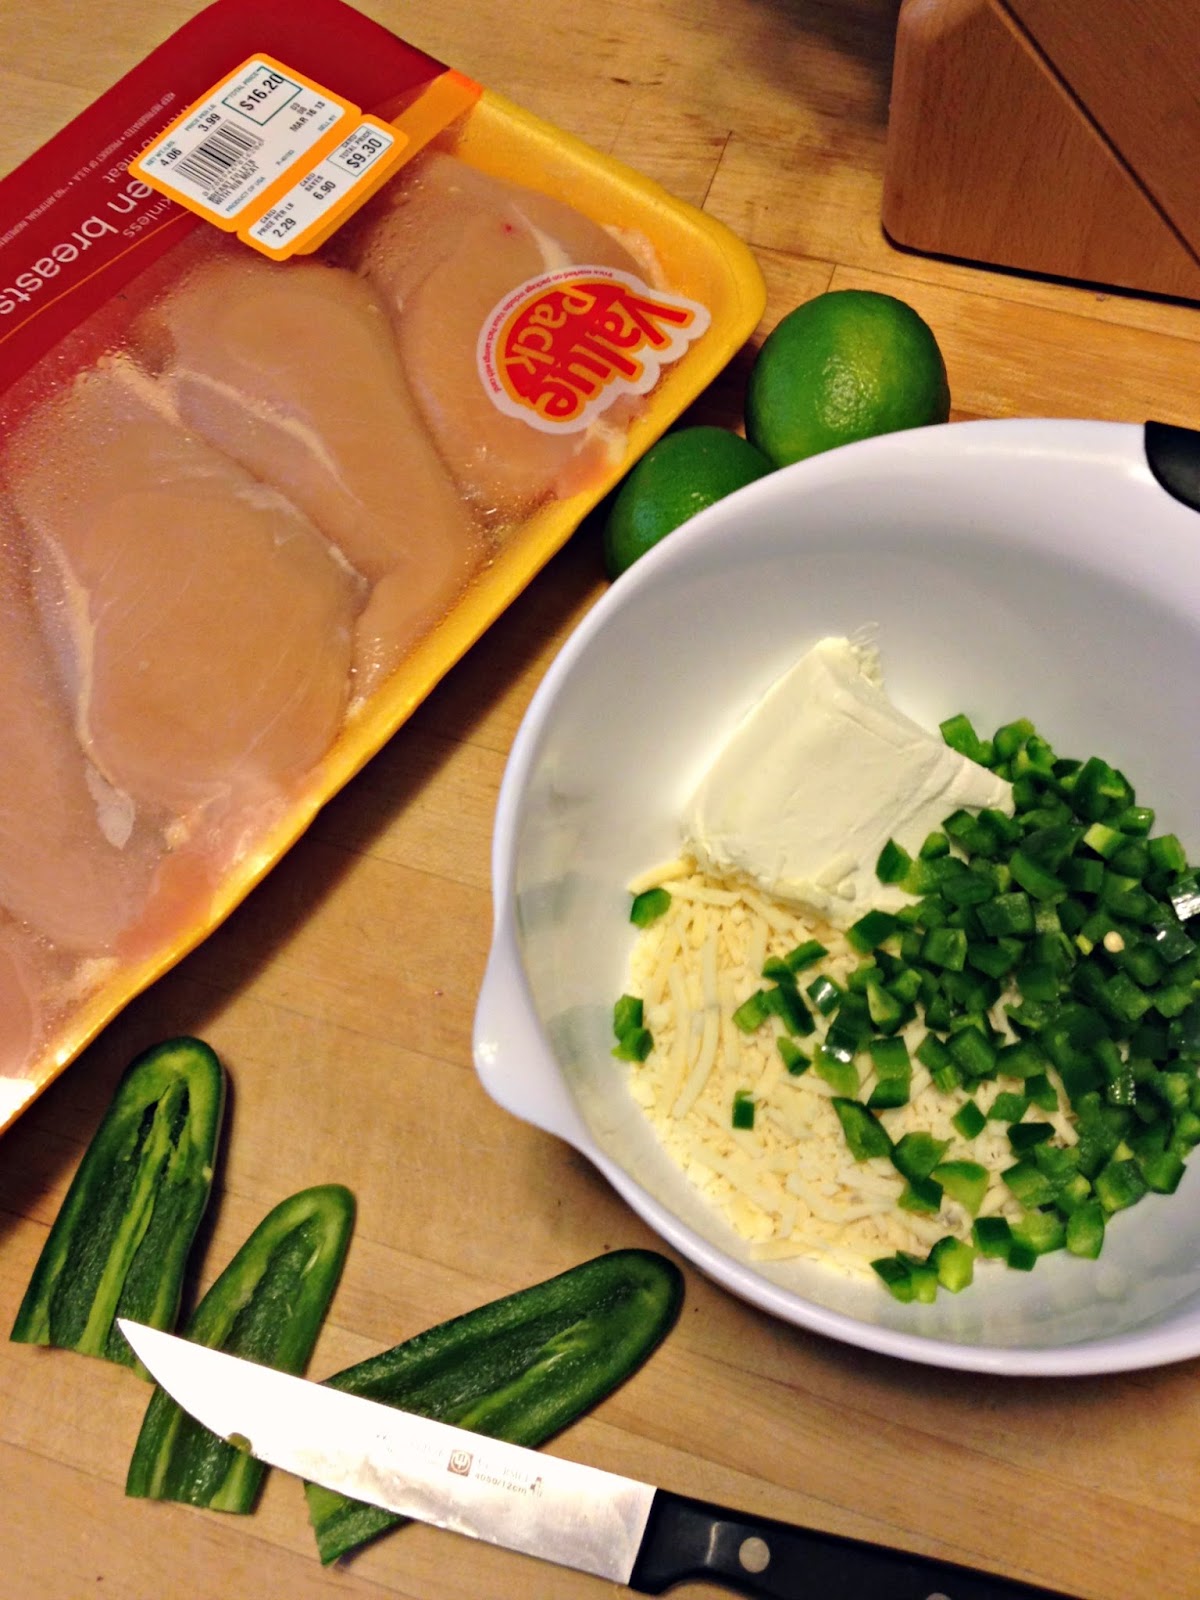
know it was going to be good? We like our spicy food at the Buttercream Is Better house, and Jalapeño Poppers are one of my favorite appetizers. It has the the usual popper ingredients (jalapeños, cream cheese, cheddar cheese) with the addition of red bell pepper, onion, chicken, classic chili spices, beans, corn and other fabulous ingredients. This is filling enough to have as a main dish and could easily be doubled for a large gathering or game day.
Jalapeño Popper Chicken Chili:
Serves 4-6
3-4 T olive oil
1 small onion
1 red bell pepper
4 fresh jalapeños
4 cloves of garlic
sea salt
black pepper
1.25 lbs boneless, skinless chicken breast
2 teaspoons chili powder
1 tablespoon ground cumin
1 teaspoon smoked paprika
1 (15oz) can diced or chopped tomatoes in juice
2 cans cannellini beans, drained & rinsed
2 cups frozen corn
1 1/2 cups chicken broth
8 oz cream cheese
5 slices bacon
1/2 cup shredded cheddar cheese, divided
handful of sliced green onions or a few extra jalapeño slices, for garnish
Cut the stem end off of your jalapeños. You can also remove the seeds if you want to lessen the spiciness, or leave them if you like it kicked up a notch. Cut your onion in half and set aside. Cut the stem off your red pepper, remove the seeds and membrane, and cut into quarters. Pop the jalapeños, onion, red pepper and garlic cloves into a food processor and pulse until finely minced. If you do not have a food processor, you could do this with a sharp knife (it just takes longer and I do not have the patience nor ninja knife skills).
In a very large pot, sauté the vegetable mixture in the olive oil over medium heat, stirring occasionally and until softened, about five minutes. While the veggies are sautéing, cut your chicken into bite-sized pieces and sprinkle both sides with salt and pepper. Push the vegetables to one side of the pot and add your chicken pieces. Lightly brown the chicken pieces on all sides. Add the chili powder, cumin, and smoked paprika and stir until thoroughly combined.
Add the diced tomatoes, cannellini beans and corn to the pot. Stir well and add the chicken broth. Let this mixture start to bubble, then reduce heat to a simmer for 30 minutes, stirring occasionally. While your chili is simmering, fry your bacon until crispy, drain on a paper towel and chop.
Cut your cream cheese into small pieces (to help it melt faster) and add to the pot. Add about half the cheddar cheese. Stir constantly until the cheeses are completely melted, about five minutes. Remove from heat. Ladle into serving bowls and top with remaining cheddar, bacon, and green onions or jalapeño slices, if desired.
Sunday, April 14, 2013
Cheesy Chicken Pot Pie Cups
Some people call these Chicken Pot Pie Cupcakes.... I refuse. It's a principle thing. It really goes against everything in my being. Look at my site's name - I clearly take my desserts pretty seriously. Savory ingredients? Not a cupcake. No frosting? Nope, not a cupcake. You won't change my mind. It's a thing I have.
I do, however, love miniature things... so I won't hold the fact that some people incorrectly label these Cheesy Chicken Pot Pie Cups against them. Look how cute they are! They have all the flavors of a classic pot pie, are so easy and are fast enough to satisfy a weeknight comfort food craving. Plus, they have portion control working for them and are lighter on the calories than their original counterpart. (If you do have the time and/or calories to spare, I highly recommend this recipe for full-on chicken pot pie with a puff pastry crust... it's our favorite). I've actually served these Pot Pie Cups at a baby shower because they are filling but small, easy to eat, and really tasty. Plus, what is it about serving mini things at showers? It's pretty much required. But since Mondays are generally pretty rough, you don't need to wait for a special occasion. You deserve something fast & satisfying... like these in all of their miniature glory.
Cheesy Chicken Pot Pie Cups:
Original recipe from between3sisters found here
1 can reduced-fat biscuits (10-count)
1 cup cooked chicken breast, diced
1 (10.5oz) can reduced fat cream of chicken soup
2/3 cup shredded low-fat cheddar cheese
1 cup frozen mixed veggies (broccoli, cauliflower, corn, peas, etc)
1 teaspoon dried parsley flakes
1 teaspoon onion powder
1/4 teaspoon black pepper
Preheat the oven to 400 degrees. Lightly grease a 12-cup muffin pan, separate the biscuits and place each biscuit into a cup of the muffin pan. Press the dough down and up the sides of each cup. In a medium bowl, combine all remaining ingredients and mix well to combine.
Evenly distribute the chicken mixture into each biscuit cup. Bake for 12-15 minutes or until edges of the cups are golden brown. Serve hot.
You can find the nutritional information on the original website here.
Wednesday, March 27, 2013
Lightened Up Baked Potato Soup
Mother Nature is being sort of mean. Mean, mean.
Spring still hasn't decided to cooperate here in PA. So even as we approach Easter weekend, I still find myself craving comfort foods to combat the cold weather outside. Hopefully our local kiddos won't need to be hunting eggs knee deep in snow this year, although I wouldn't be surprised.
This soup has all the flavors of a restaurant-style loaded baked potato. It's fast enough for a weeknight, and it won't majorly set you back in your calorie intake since it uses low-fat/low-sodium ingredients whenever possible. This is good news considering you probably ate about five peanut butter eggs today. Which is why we're such good friends... great minds think alike.
Serves 4-6
4 baking potatoes, about 2.5lbs
3 tablespoons butter, divided
small amount of onion, diced
small amount of celery, diced
1 clove garlic, minced
1/3 cup flour
5 cups milk (I used skim)
1 cup low-sodium chicken or vegetable broth
1 cup part-skim shredded cheddar cheese
2 teaspoons salt
1 teaspoon black pepper
1 cup fat-free sour cream
6 slices low-sodium bacon, cooked and crumbled (optional)
Scrub potatoes under running water and pat dry. Poke several holes in the potatoes with a fork to vent
Spring still hasn't decided to cooperate here in PA. So even as we approach Easter weekend, I still find myself craving comfort foods to combat the cold weather outside. Hopefully our local kiddos won't need to be hunting eggs knee deep in snow this year, although I wouldn't be surprised.
This soup has all the flavors of a restaurant-style loaded baked potato. It's fast enough for a weeknight, and it won't majorly set you back in your calorie intake since it uses low-fat/low-sodium ingredients whenever possible. This is good news considering you probably ate about five peanut butter eggs today. Which is why we're such good friends... great minds think alike.
Lightened Up Baked Potato Soup:Serves 4-6
4 baking potatoes, about 2.5lbs
3 tablespoons butter, divided
small amount of onion, diced
small amount of celery, diced
1 clove garlic, minced
1/3 cup flour
5 cups milk (I used skim)
1 cup low-sodium chicken or vegetable broth
1 cup part-skim shredded cheddar cheese
2 teaspoons salt
1 teaspoon black pepper
1 cup fat-free sour cream
6 slices low-sodium bacon, cooked and crumbled (optional)
Scrub potatoes under running water and pat dry. Poke several holes in the potatoes with a fork to vent
Tuesday, March 26, 2013
Cheesy Broccoli Quinoa
Can we talk about my painfully obvious quinoa kick lately? It might be up there with avocados and anything salted caramel as one of my top food obsessions. Quinoa is often touted a "superfood" because it's high in protein and it's a good source of dietary fiber, iron, and even a little calcium. Because it packs such a nutritional punch, I don't mind throwing cheese on top and calling it a deliciously rounded-out side dish.
I never used to be very good at side dishes. I spent so much time menu planning for the week for just the main course, that sometimes I forgot that something actually needs to be on the plate with it. I've gotten much better at making creative sides now (goodbye lazily steaming veggies every single day), though I still prefer the quick & easy variety that have some nutrients are are easy to throw together while the main dish is finishing up. I served this with a chicken dish and it was delicious! I don't even think my husband knew he was eating something healthy. Mwahaha... trickery.
Cheesy Broccoli Quinoa:
Adapted from Closet Cooking
Serves 4
1 cup quinoa, well rinsed
1 3/4 cup vegetable broth, chicken broth or water
2 cups fresh broccoli, chopped
1 cup shredded cheddar
salt and pepper to taste
Add the quinoa, broth/water and broccoli to a boil over medium heat. Once boiling, cover the pot and reduce the heat to medium low. Simmer, stirring occasionally, until the broth has been absorbed and the quinoa is tender (about 15 minutes). Remove from heat and stir in cheese until melted. Add salt and pepper to taste and serve immediately.
I never used to be very good at side dishes. I spent so much time menu planning for the week for just the main course, that sometimes I forgot that something actually needs to be on the plate with it. I've gotten much better at making creative sides now (goodbye lazily steaming veggies every single day), though I still prefer the quick & easy variety that have some nutrients are are easy to throw together while the main dish is finishing up. I served this with a chicken dish and it was delicious! I don't even think my husband knew he was eating something healthy. Mwahaha... trickery.
.jpg)
Adapted from Closet Cooking
Serves 4
1 cup quinoa, well rinsed
1 3/4 cup vegetable broth, chicken broth or water
2 cups fresh broccoli, chopped
1 cup shredded cheddar
salt and pepper to taste
Add the quinoa, broth/water and broccoli to a boil over medium heat. Once boiling, cover the pot and reduce the heat to medium low. Simmer, stirring occasionally, until the broth has been absorbed and the quinoa is tender (about 15 minutes). Remove from heat and stir in cheese until melted. Add salt and pepper to taste and serve immediately.
Friday, March 22, 2013
Cannoli Stuffed French Toast
Happy Weekend! I know that last post was all about healthy breakfasts and all... but after a challenging week at work, can you imagine anything better than waking up late on Saturday morning to these babies?
I certainly can't. We all know weekends are for the really fun breakfasts you just can't squeeze into the work week. This French toast is the perfect special occasion brunch item... or you know, just because you're feeling fancy on an ordinary Saturday like I was. Plus, I have a crazy affinity for cannolis (um, who doesn't?) so I pretty much knew these had to be amazing from the moment I saw them over at Two Peas and Their Pod. The filling is creamy and decadent, with a yummy crunch of mini chocolate chips in every yummy bite. I had mine with syrup because I believe in Buddy the Elf's basic food groups, but this really was to die for on its own.
Cannoli Stuffed French Toast:
Original recipe by Two Peas & Their Pod
1 cup ricotta cheese (I used low-fat)
1/4 cup powdered sugar
1/2 teaspoon vanilla
1/3 cup regular or mini chocolate chips
2 large eggs
1/4 cup heavy cream or milk
4 slices French bread
2 tablespoons butter
powdered sugar, for serving
syrup, if desired
In a small bowl, combine ricotta cheese, powdered sugar & vanilla. Stir in the chocolate chips and set the mixture aside.
In a shallow bowl, whisk together the eggs and cream (or milk) until thoroughly combined. Spread 2 of
Thursday, March 14, 2013
Skinny Jalapeño Popper Baked Stuffed Chicken
We are reaching the point with our weather in PA where we are all starting to get a little sick of being cold all the time. Since daylight savings was just last week, it's even more of a tease that we longer days filled with sunlight, but it's still 30 freaking degrees. Spring is definitely close, but there is still some time for some comfort food. And since Summer and bathing suit season directly follow Spring, it's probably better if we start making that comfort food healthified!
That's when I turn to Gina from skinnytaste.com™. She's amazing. She pulls a mulligan on some of my favorite things to eat and gives them a healthy makeover. And who doesn't love jalapeño poppers? Those delicious, cheesy peppers thatsome people I myself have been guilty of making wrapped in bacon on multiple occasions. This dinner combines all the flavors of the decadent appetizer into a pretty healthy main dish. You get the creaminess of the spicy cheddar jack cheese and cream cheese, mixed with the kick of the fresh jalapeños and brightness from the lime juice it gets dunked in. This is definitely one of my favorite dinners to make at home and made our regular rotation. A serving is 2 pieces so it's perfect served with a side salad or some beans & rice.
I have made these without the scallions and swapped the cheddar jack for pepper jack and it's still mouthwateringly good. To see the finished product and get the recipe (with nutrition facts) head over to see Gina at skinnytaste.com™!
That's when I turn to Gina from skinnytaste.com™. She's amazing. She pulls a mulligan on some of my favorite things to eat and gives them a healthy makeover. And who doesn't love jalapeño poppers? Those delicious, cheesy peppers that
They may look like porcupines, but those toothpicks keep the spicy, cheesy goodness from escaping too soon. |
Subscribe to:
Posts (Atom)